This video tutorial explains the process of data migration using staging tables in SAP. The instructor demonstrates how to create an empty data migration project, upload data to staging tables, and then transfer that data to the SAP S/4HANA system.
Key topics covered in the video session are:
- Introduction to Data Migration Using Staging Tables:
- The video begins with an overview of data migration using staging tables in SAP.
- Creating an Empty Data Migration Project:
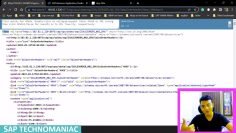
- Navigate to SAP Easy Access and type in the transaction code “LTMC”.
- The system will open a browser interface where a new project can be created.
- The instructor creates a project named “DM project 8” and explains the significance of the Mass Transfer ID and database connection.
- Staging Tables Creation:
- Upon selecting a migration object (e.g., Bank), the system will copy the standard migration object to the migration project and create the associated staging tables.
- Uploading Data to Staging Tables:
- Data can be uploaded to staging tables using ETL tools, HANA Studio, or a custom ABAP program.
- The instructor demonstrates using a custom ABAP program to upload data from an Excel file to the staging table.
- Starting the Data Transfer:
- After uploading the data, the next step is to start the data transfer.
- The system will validate the data, convert values, and simulate the import to ensure there are no errors.
- Executing the Data Transfer:
- The instructor clicks on “Start Transfer” to initiate the data migration process.
- Once the transfer is complete, the status will change to “Finished”.
- Displaying the Migrated Data:
- The instructor uses transaction code “F503” in SAP S/4HANA to display the migrated bank master records.